Lance Mount
Enhancements
Addressing
Remaining Issues
Event Report
201907-10
Back to Bill Caid's Home Page
The Experience
Recently, Thor (our
Mercedes Benz 1017A 4x4 truck) got new living quarters
installed. The installation went pretty smoothly and were
anxious to test the "system". A 3-month road trip was our
"test". Generally, things were as expected with the
exception of a few items. First, the way the trailer was
installed on the truck frame resulted in swaying and flexing of
the trailer frame when we were inside the rig. When walking
around inside, particularly at the rear of the living quarters,
the whole rig bobbed up and down. The reason was that there
was excessive unsupported overhand behind the rear mount.
When coupled with all the "stuff" that Kathleen had packed into
the rear storage closets, it resulted in vertigo when walking into
the restroom. The solution was to add some carefully
designed supports to reduce the overhang.
Second was that the additional weight on the truck resulted in
swaying when walking about in the living area. While not a
problem, per se, it was annoying. The solution was to design
a hydraulic stabilizer that would remove Thor's spring stack from
the equation when parked.
Third, and most annoying, was the water fill port was on the
opposite side from the normal utility connections making filling
the water tank a true chore. In addition to requiring
de-coupling from the shore water source, the hose had to be run
underneath or around the truck and the distances involved usually
required coupling multiple hoses together. Finally, given
that the Lance trailer was sitting on Thor's frame, the fill port
was almost 6 feet above ground level. The solution was to
tap into Lance's plumbing and install a mechanism to fill the
water tank while connected to shore water. Of course, this
requires the operator to pay attention and not allow the tank to
be over-filled.
This project spanned many months due to delivery delays and
component availability.
The photos below are
what we saw.

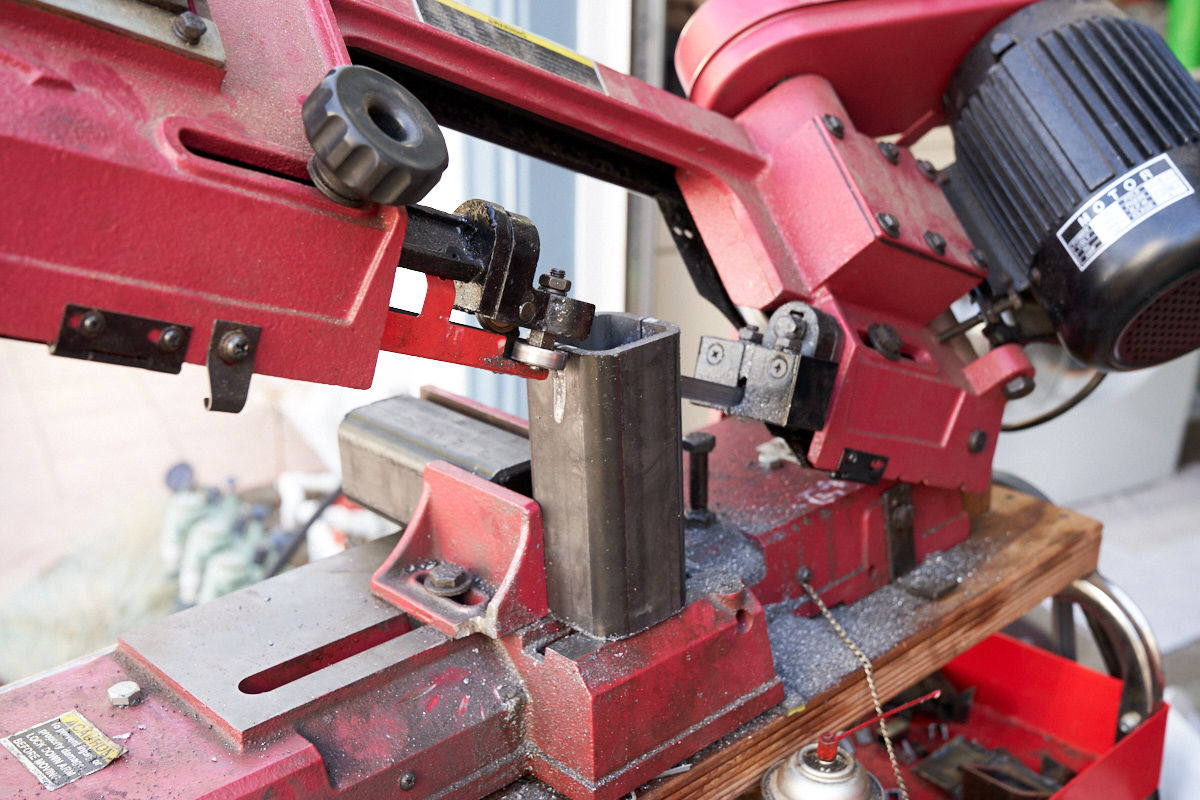
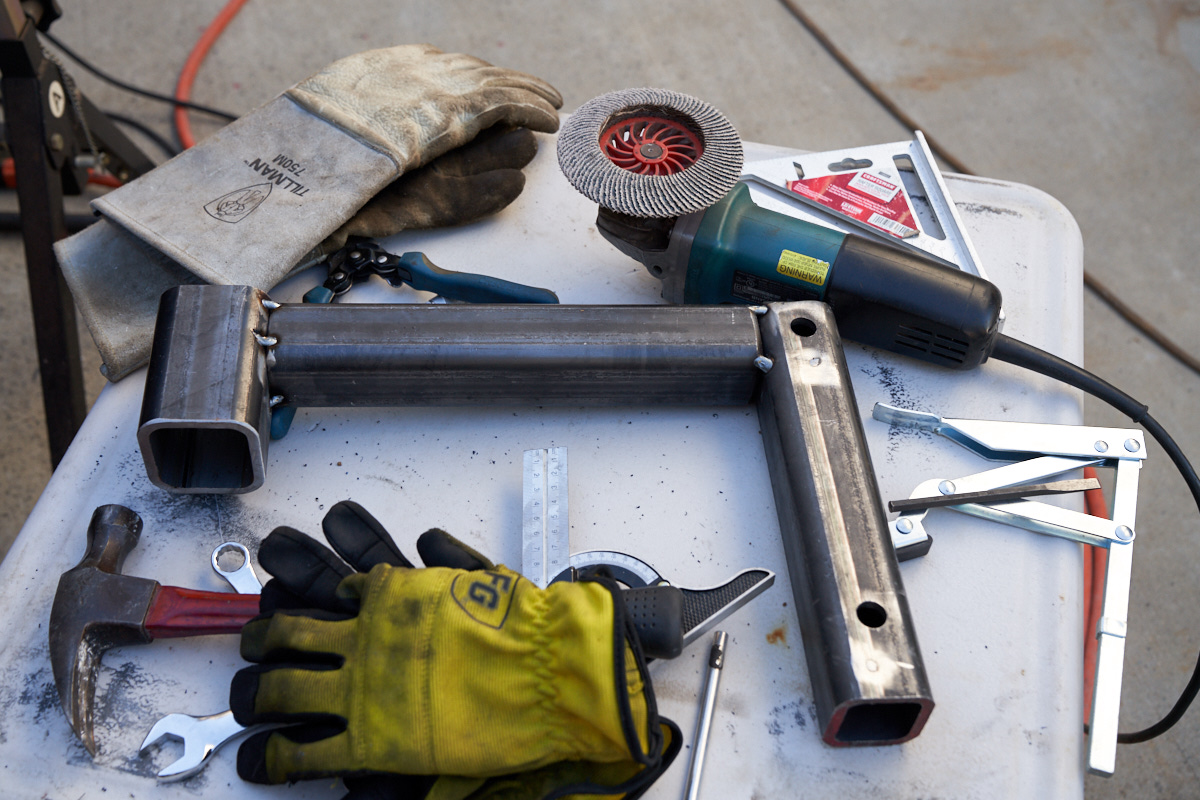
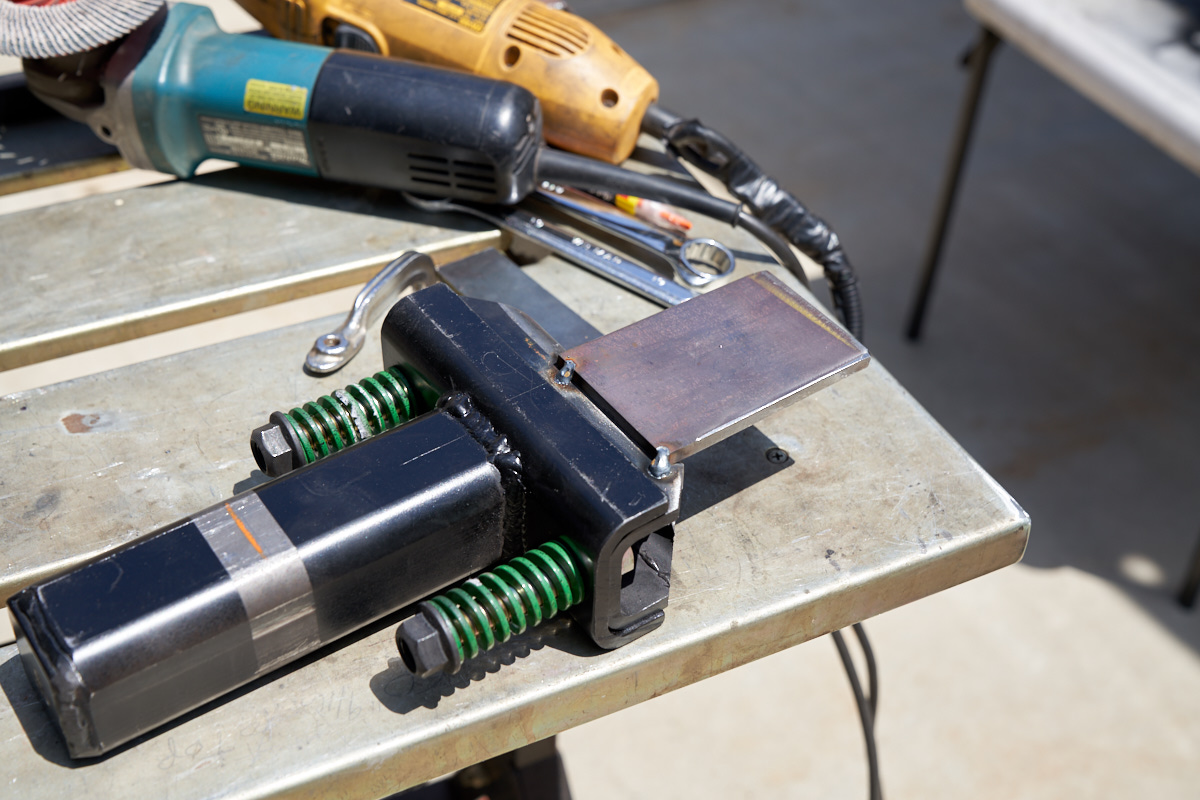
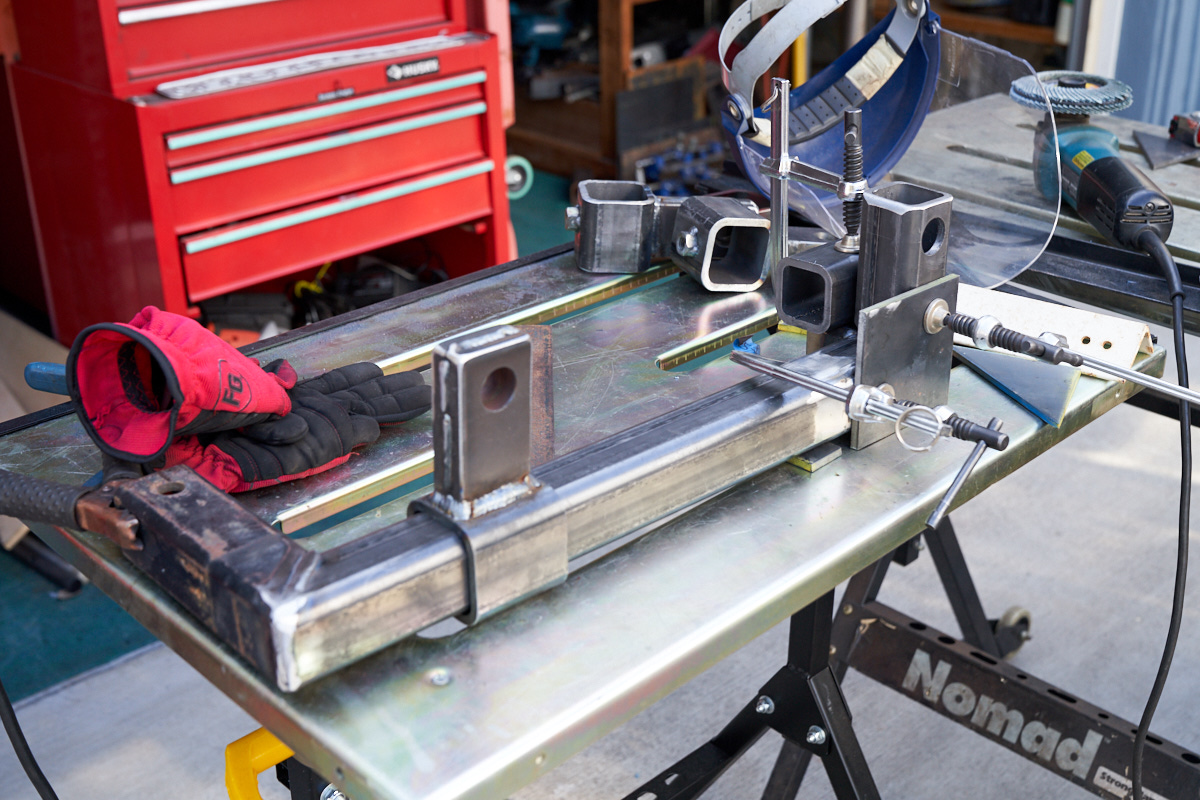
My Harbor Freight band saw was called into service to cut the
2x2x0.25" steel tubing used for the frame mounts.
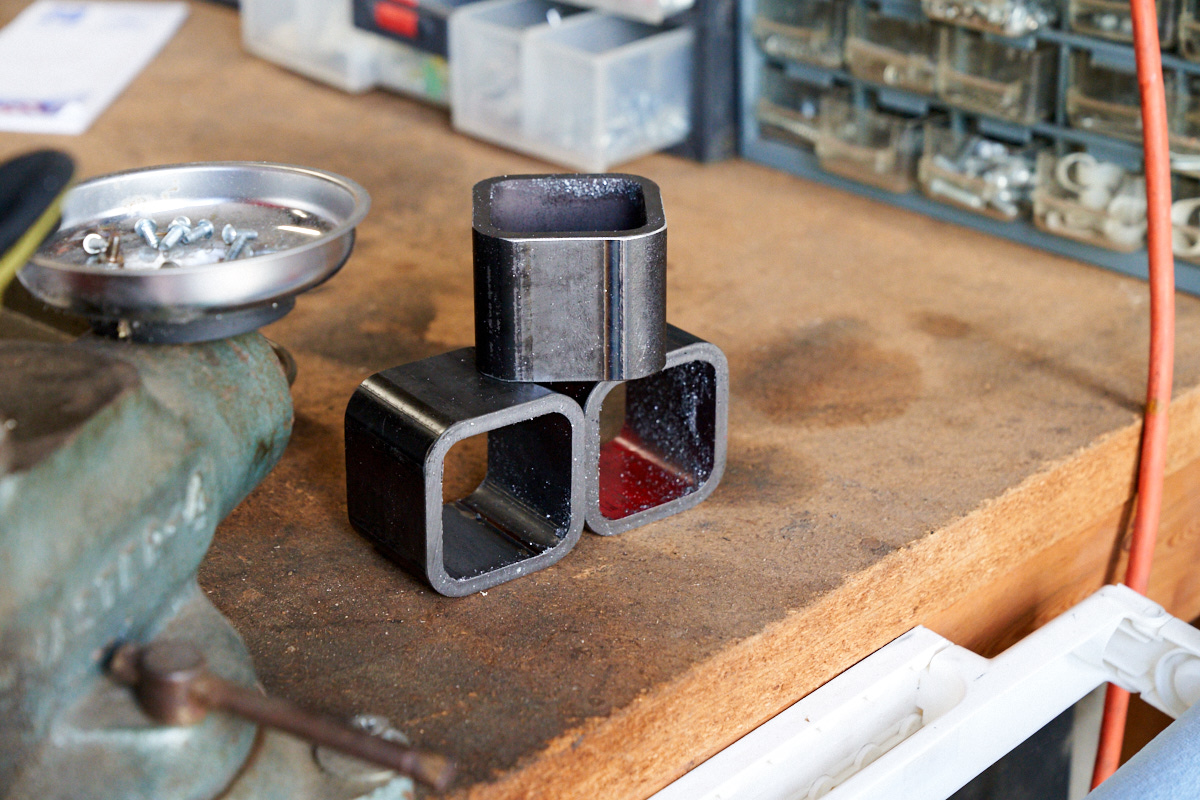
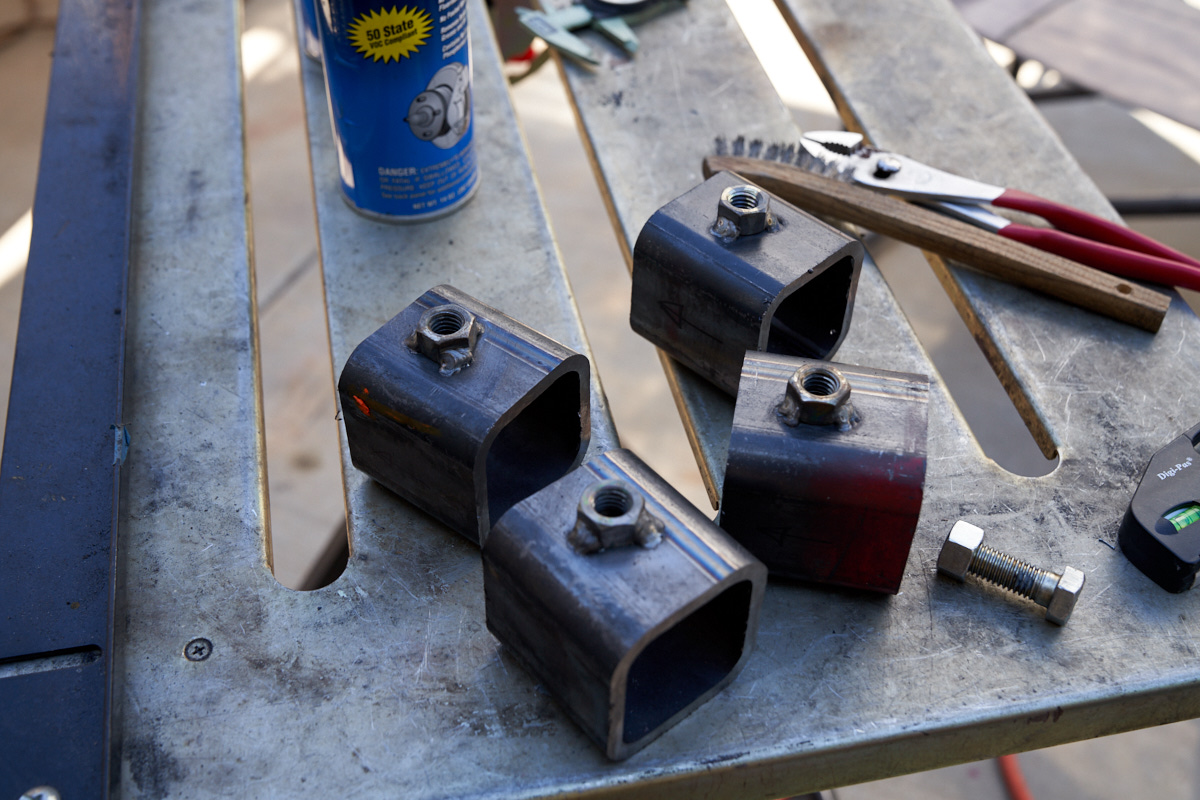
Collars were cut from 2.5x2.5x0.25" tube to slide on top of the
main mounts.
The collars were trimmed and gang-drilled.
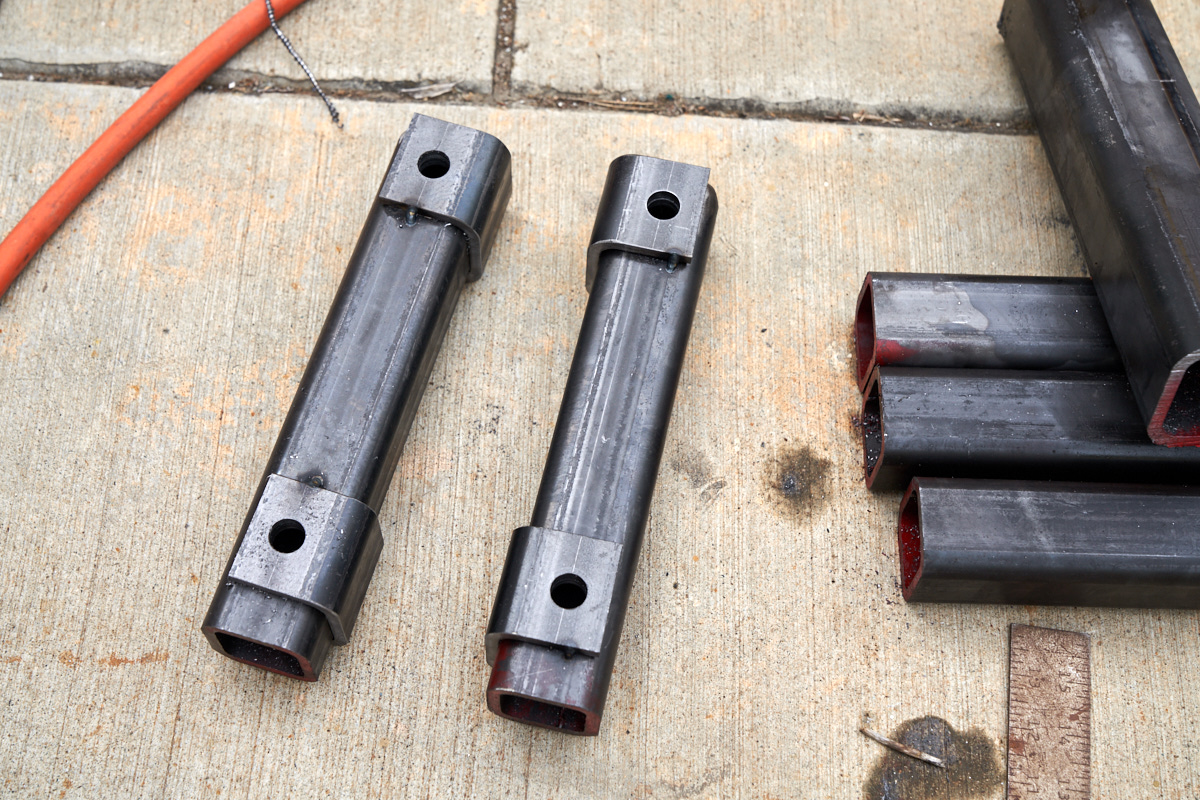
More 2.5" tube was cut length-wise to make a mounting trough.
More tube was cut to fit inside the trough.
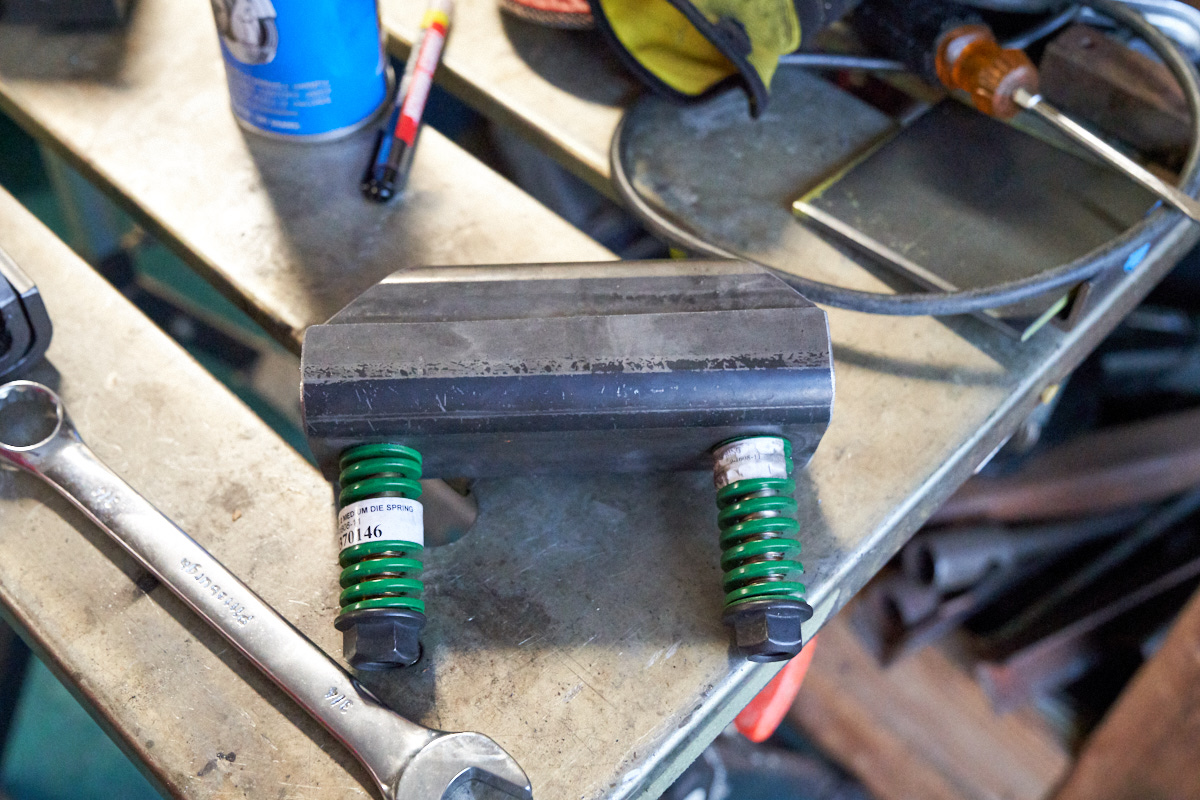
Oversided holes were drilled and die springs/bolts were used to
allow the inner tube to slide relative to the trough in a
fore-aft direction, but not laterally.

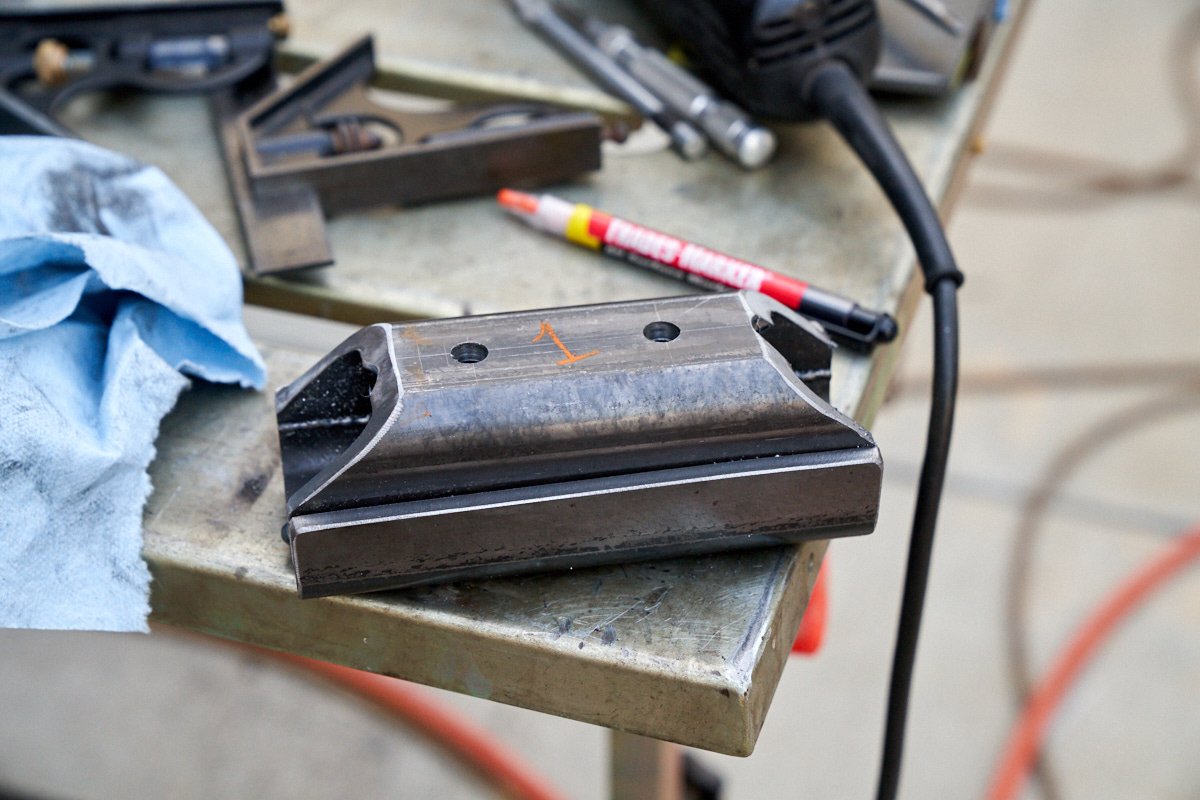
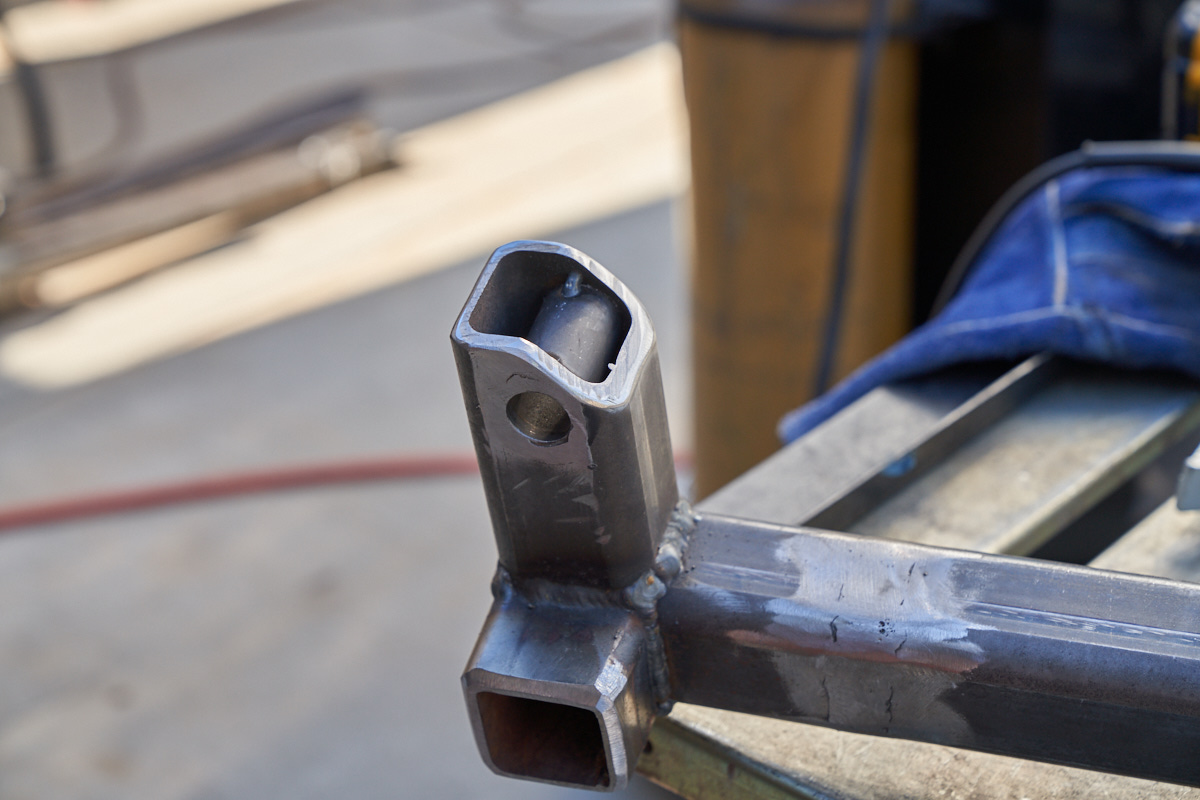
The supports for the frame were drilled to allow complete
welds. Given the intended location of the frame, existing
hardware precluded full welds, so a 1.5" hole was drilled.

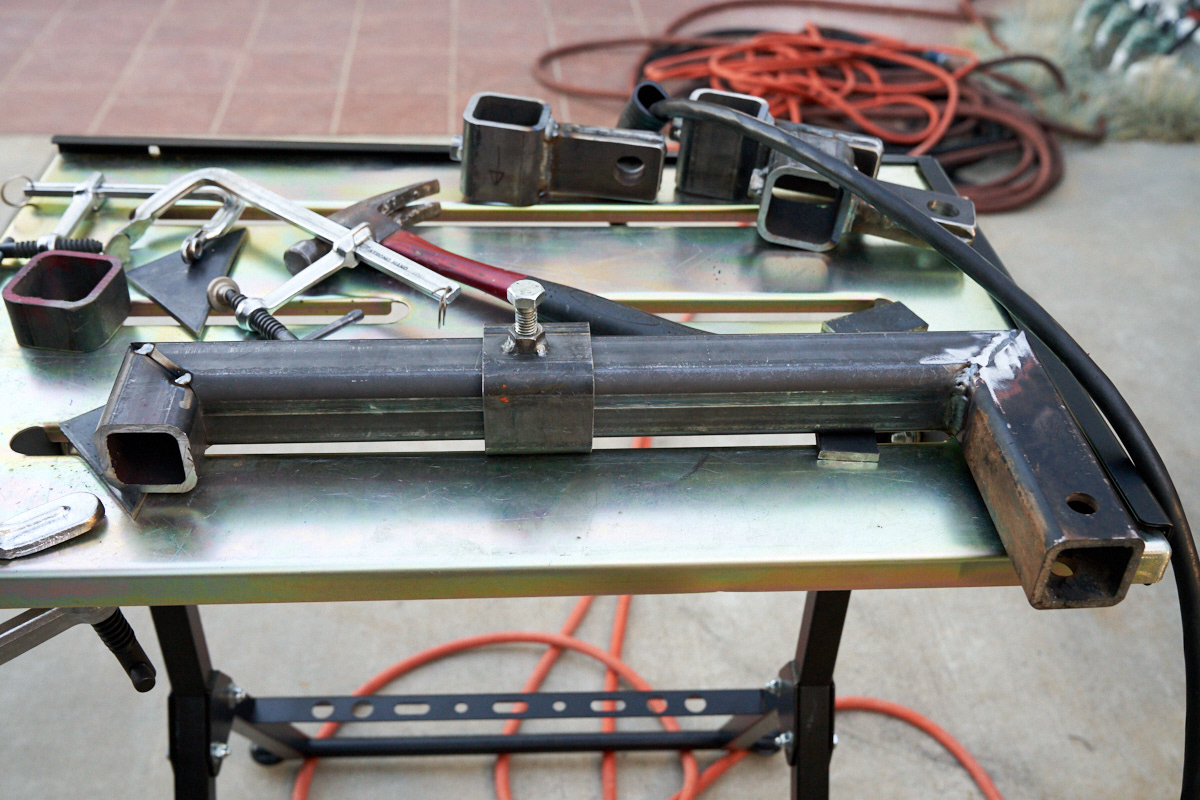
The frame parts were test-fit on the frame. The U-shaped
parts will be welded to Thor's frame and the balance of the
frame will be held in place by 5/8" grade 8 bolts. This
configuration was necessary due to the pre-load requirement.
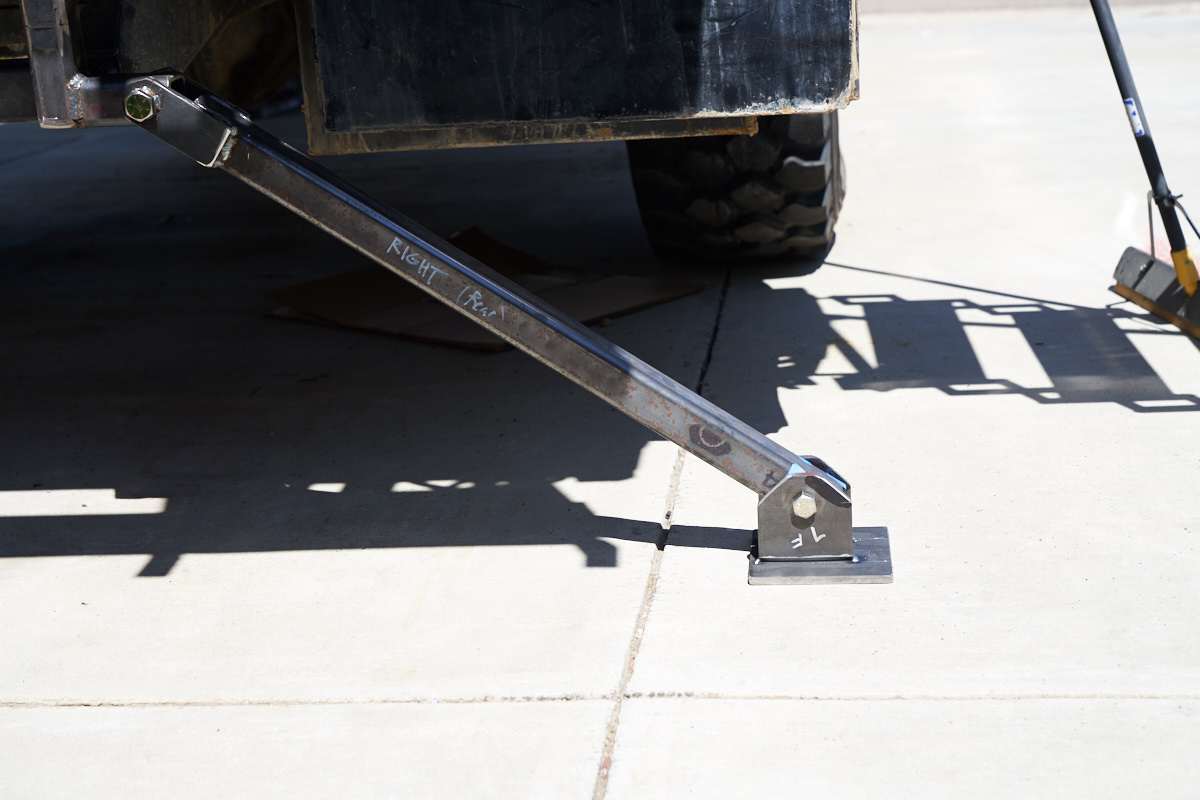
The balance of the support frame was fabricated out of 2.5 and
2.0 inch tube.
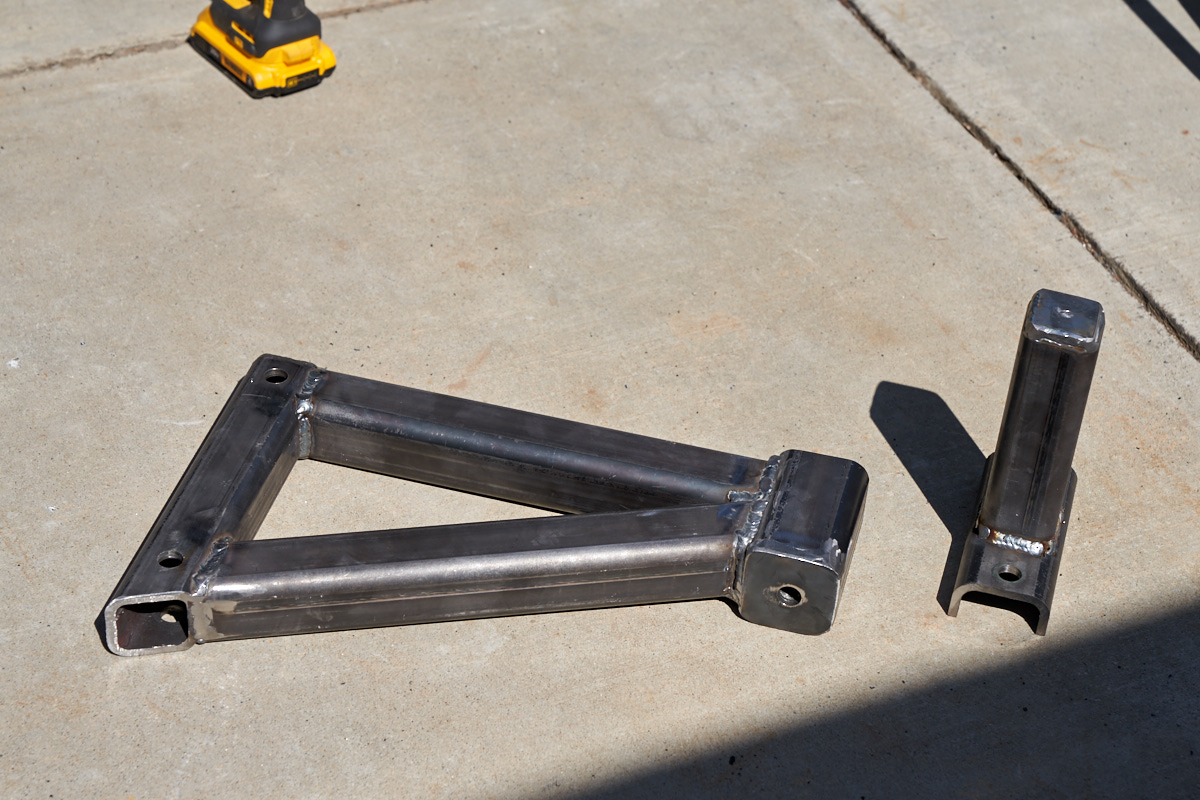
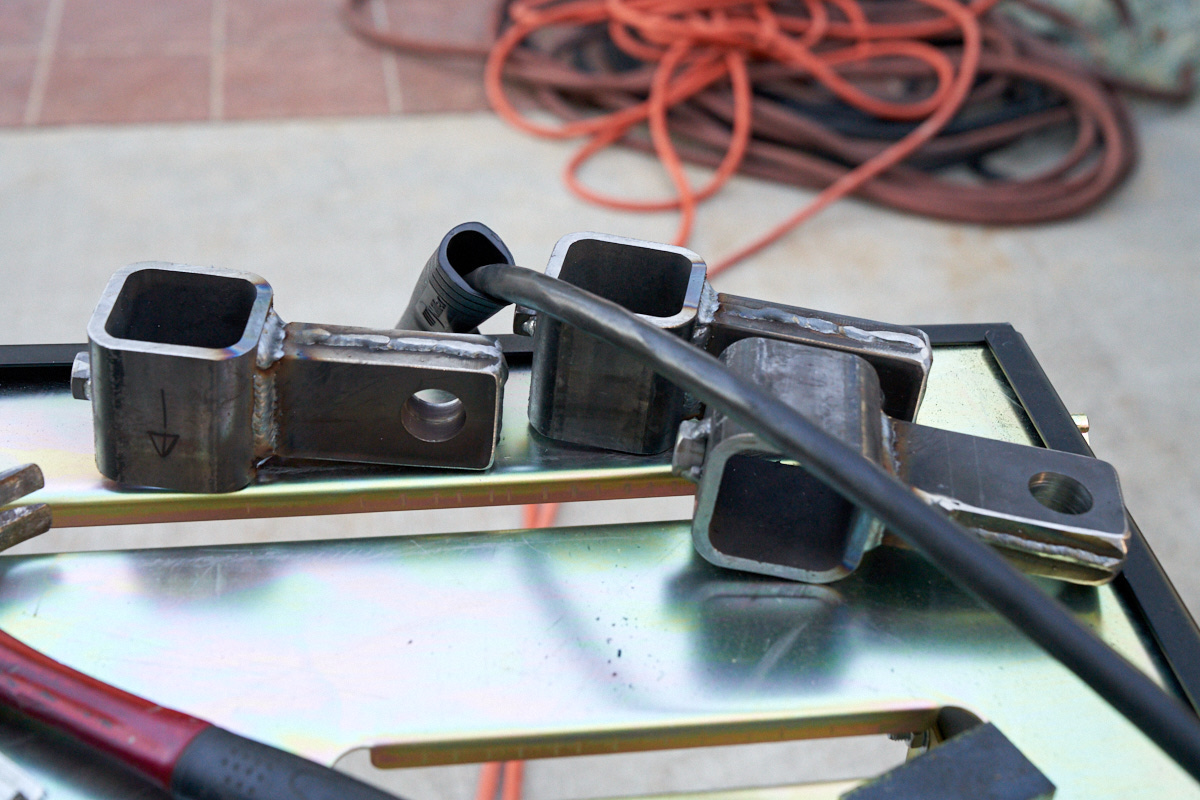
Now the crux: the triangular frame will be bolted to the
frame-mounted U attachments. The part on the right, the
riser, will be inserted into the 2.5" portion of the
frame. The hole at the bottom has a nut welded on the
inside to allow installation of a bolt which will be used to
lift the riser until the desired amount of pre-load has been
established. Then, the riser will be welded to the
receiver and the bolt removed.
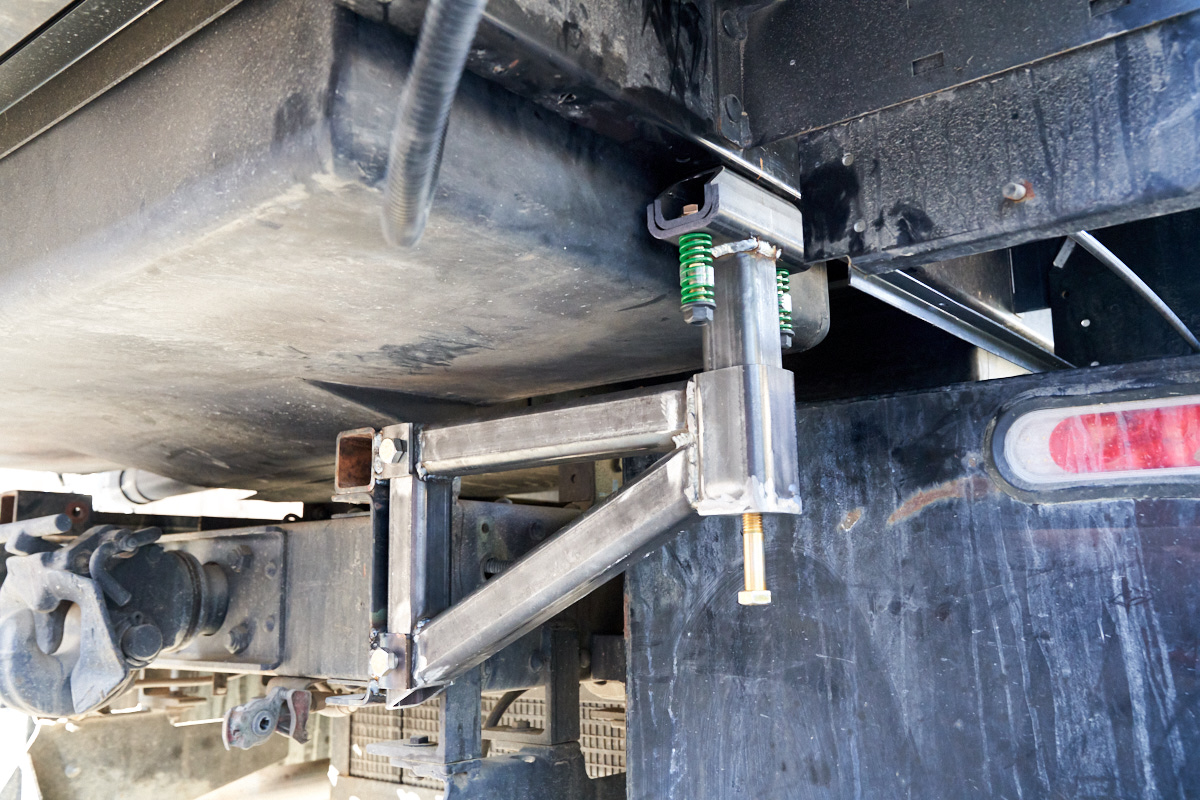
Turning the bolt raises the riser to the desired pre-load.
This side is being test fit but will be welded soon.
The passenger side had impediments that prevented easy welding
so a plate was added to allow welding without undue operator
stress. Note that the final position of the riser has been
established and the riser has been painted with the stripe left
for the actual weldment.
Once both left and right support frames were installed, we moved
on to the hydraulic stabilizers. Sliding collars were cut,
drilled and nuts were welded to allow bolts to be used as set
screws.
Sliding collars were installed prior to welding the ends on.
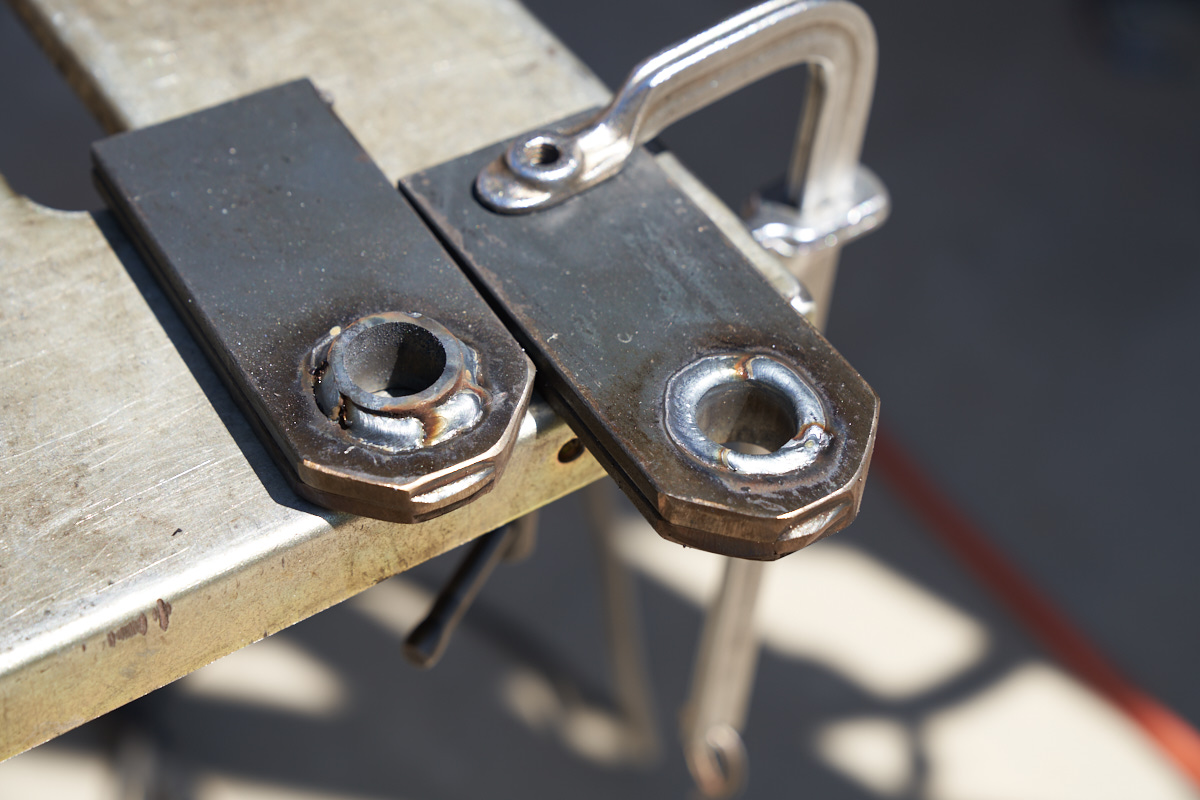
Hydraulic pivot points were added to the collars.
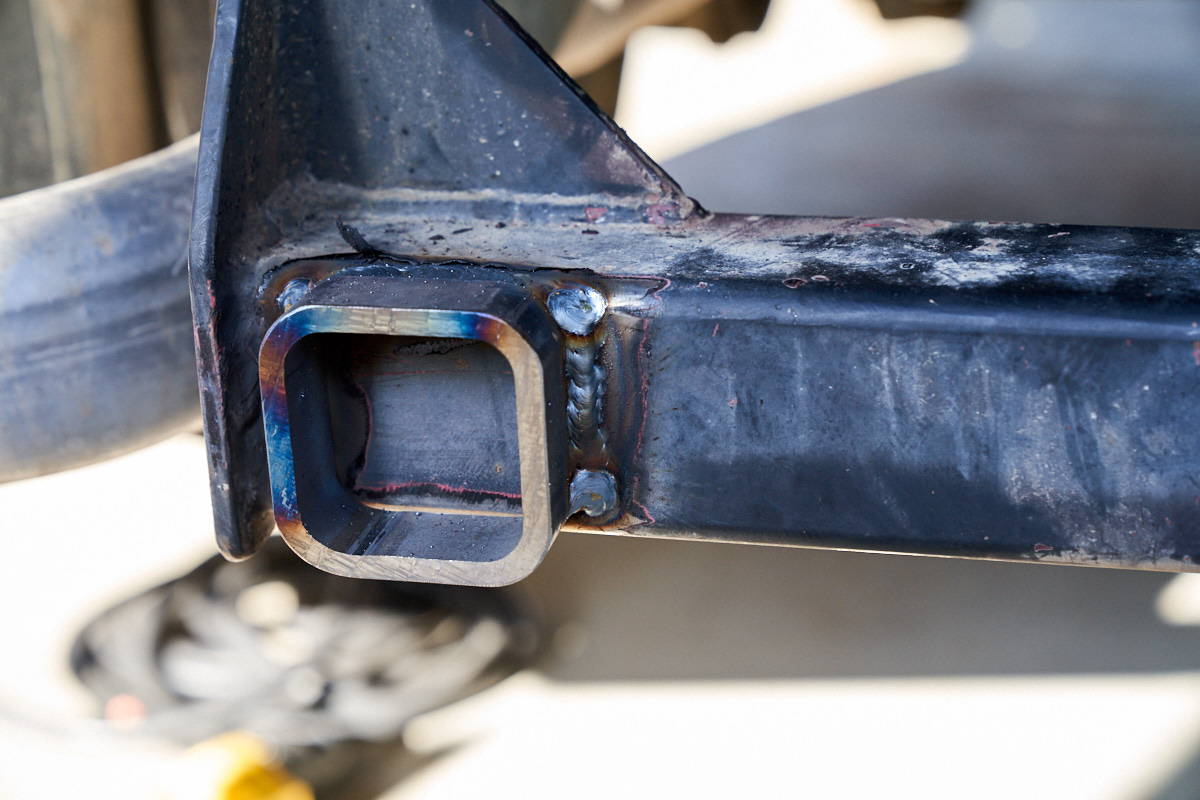
Tubing was cut and welded onto the existing trailer hitch to ease
final assembly.
The hydraulic mounting frames were hard-welded.
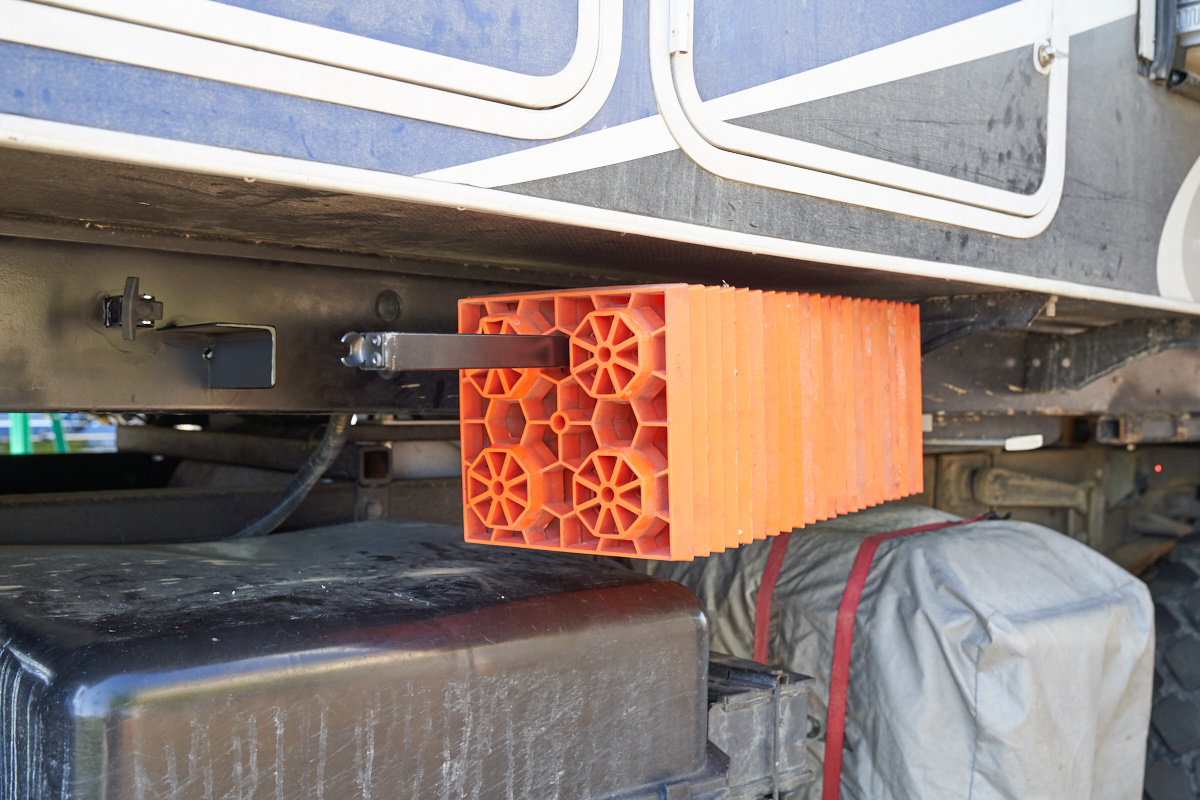
We ran out of steel for the rear so we moved on to another
ancillary project - a storage rack for our "truck Legos" which
are used for leveling and foot blocks for a jack when changing a
tire. The rack is 1x1 tube on a hinge with a rubber hood
latch to secure it.
After an extended trip to the "steel store" and a trip for more
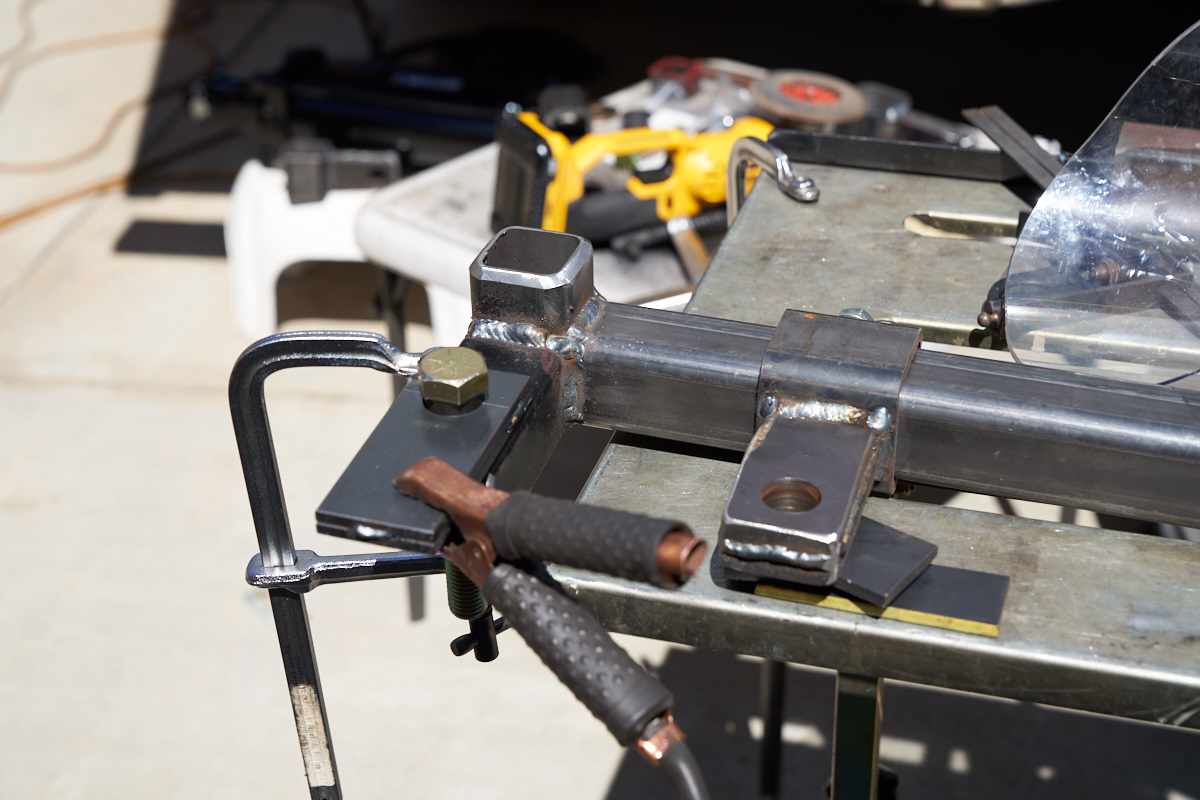
welding gas, we were back at it. Pivot plates were cut,
drilled and welded.
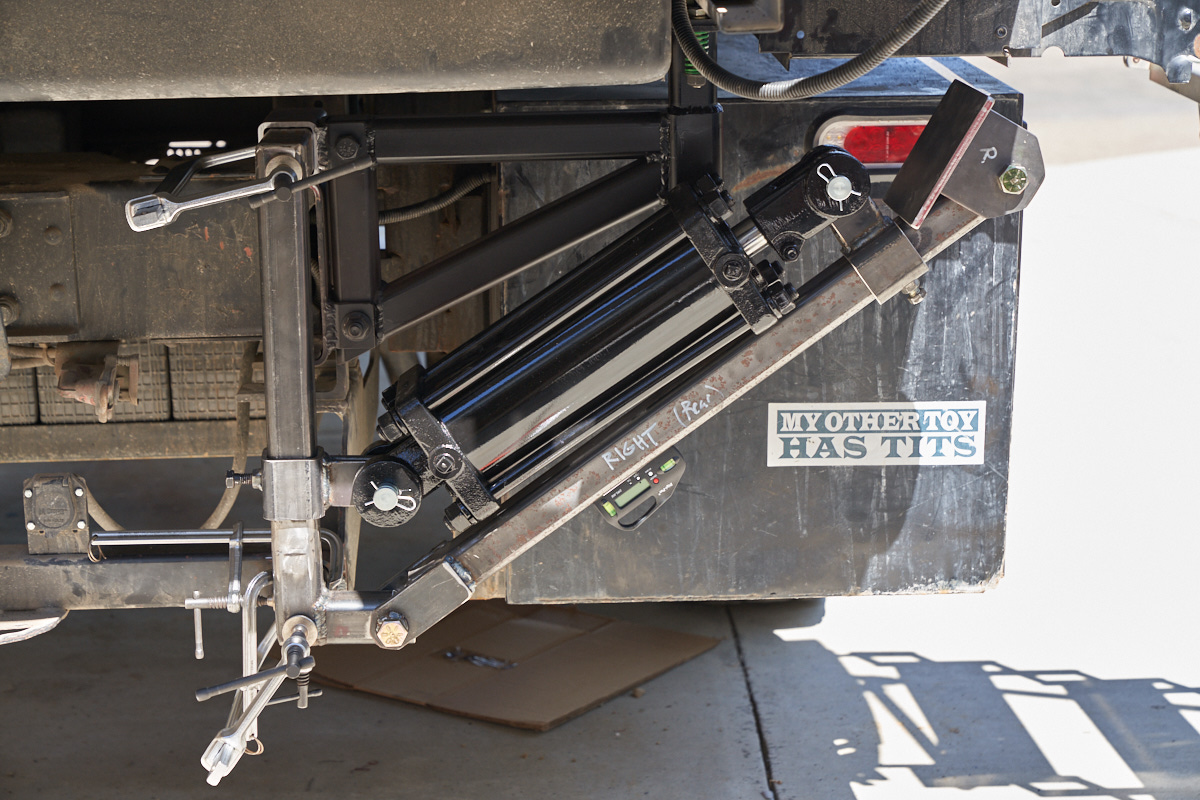
The stablizer arm is test-fit on the frame.
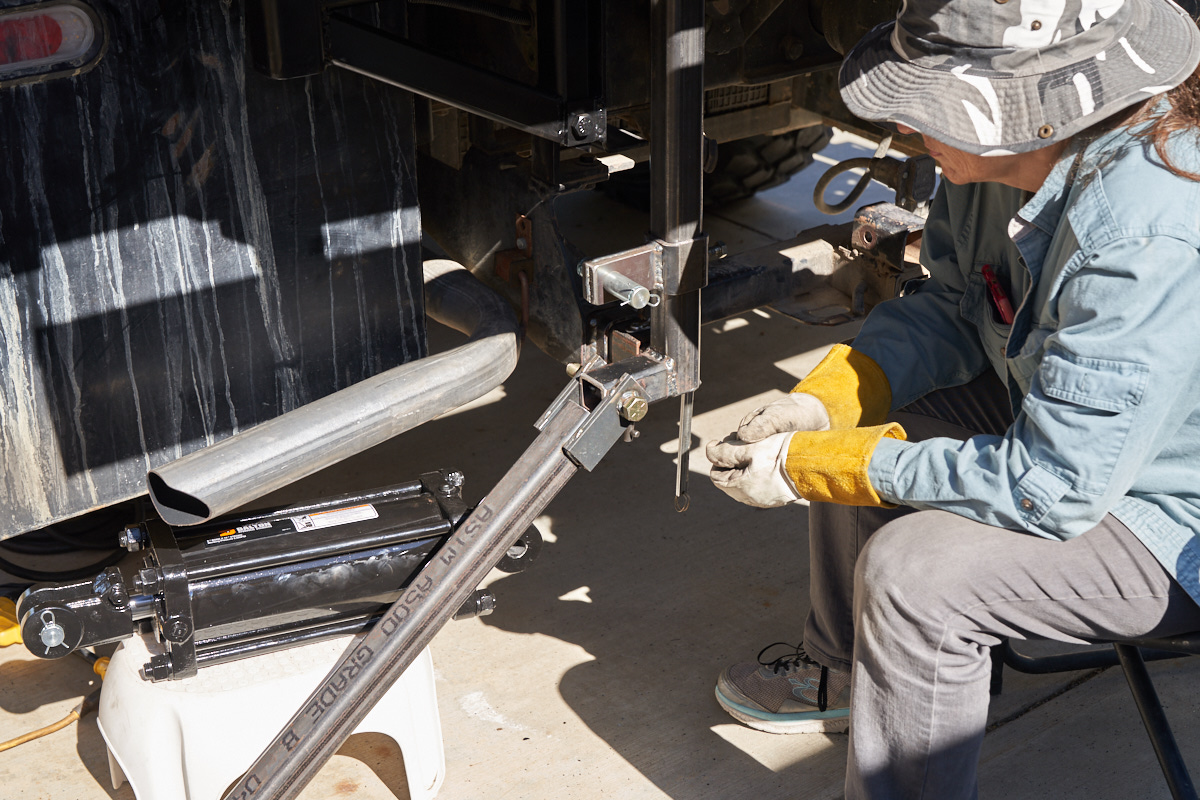
Our hydraulic cylinders finally arrived and the frame was
complete enough for a test-fit. While we were waiting for
the cylinders, feet for the arms were fabricated out of 3/8"
plate. Note that both the arm attachment and the frame
attachment points for the cylinder are adjustable. When
the final geometry has been confirmed, they will be hard-welded
and the set screws will be removed.
Pivot plates were reinforced with DOM pipe to help distribute
stress.
Test fit of the passenger side stabilizer arm.
DOM pipe was added to the pivot points for improved strength.
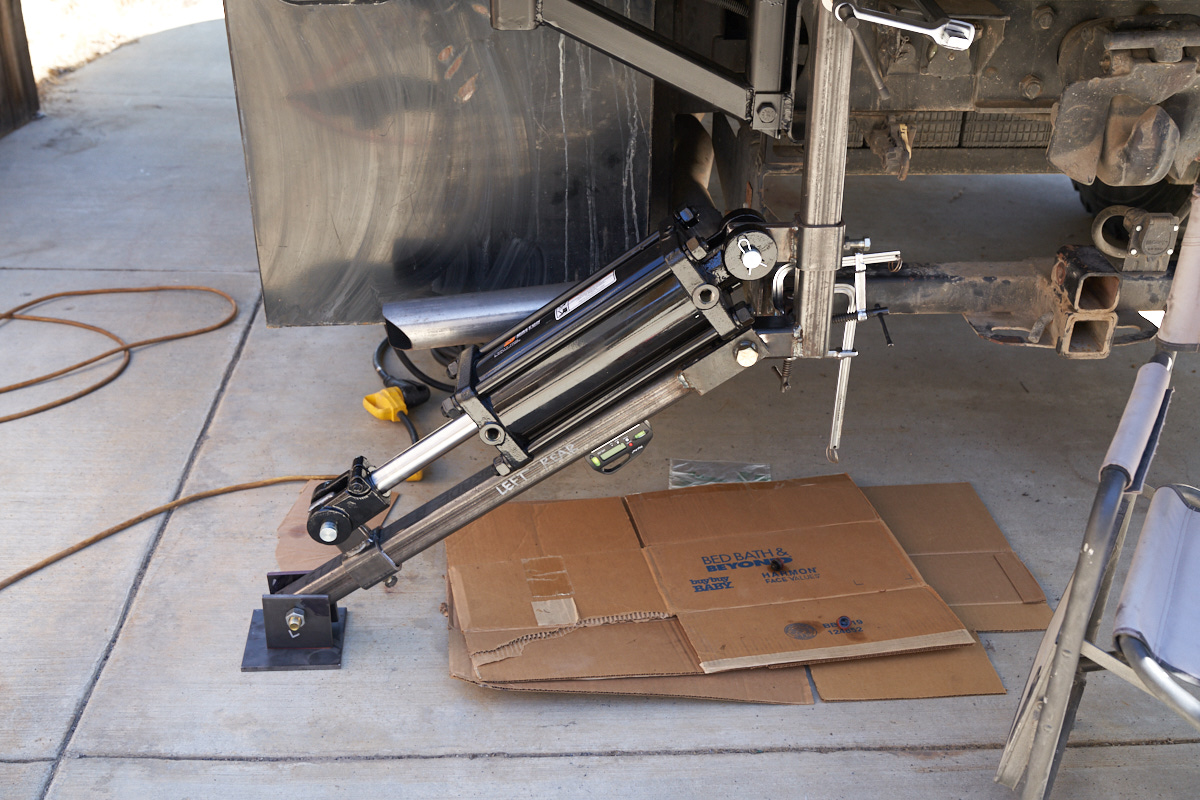
A test fit showing the retracted position of the stabilizer arm
and cylinder.
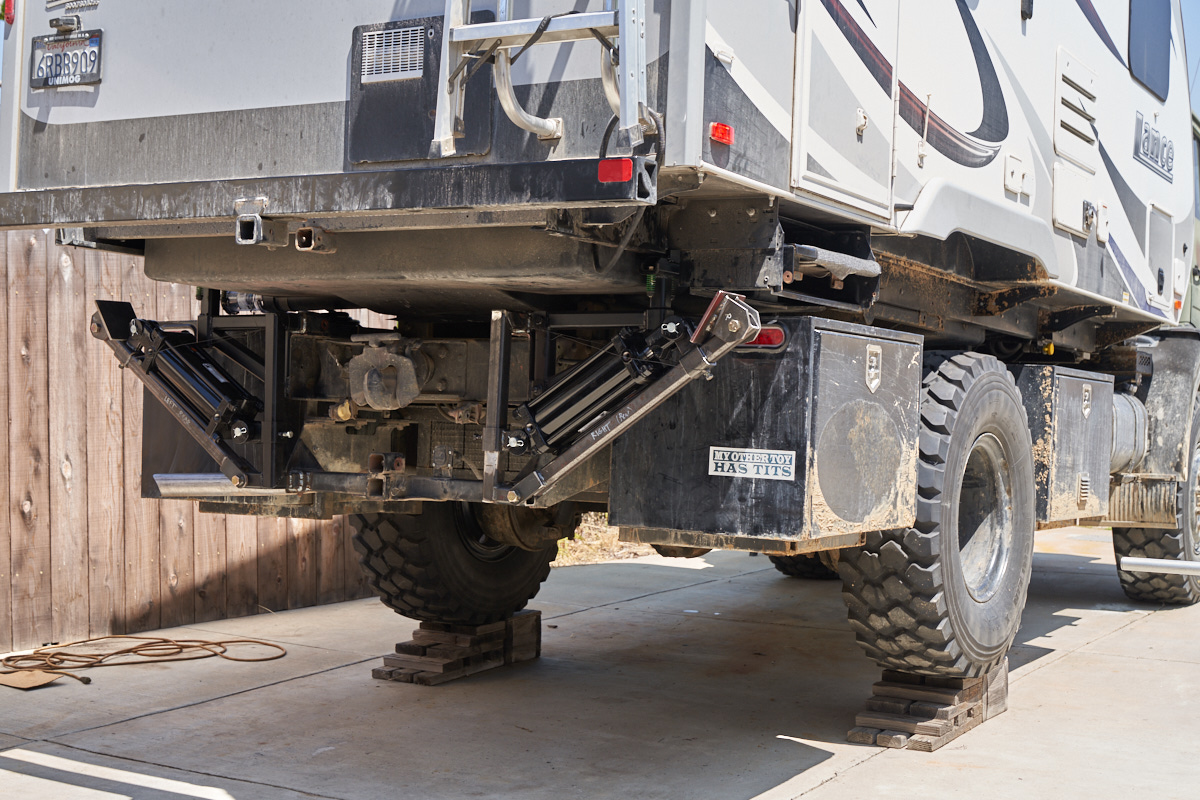
Thor was driven onto blocks to elevate the rear for range-of-motion
testing.
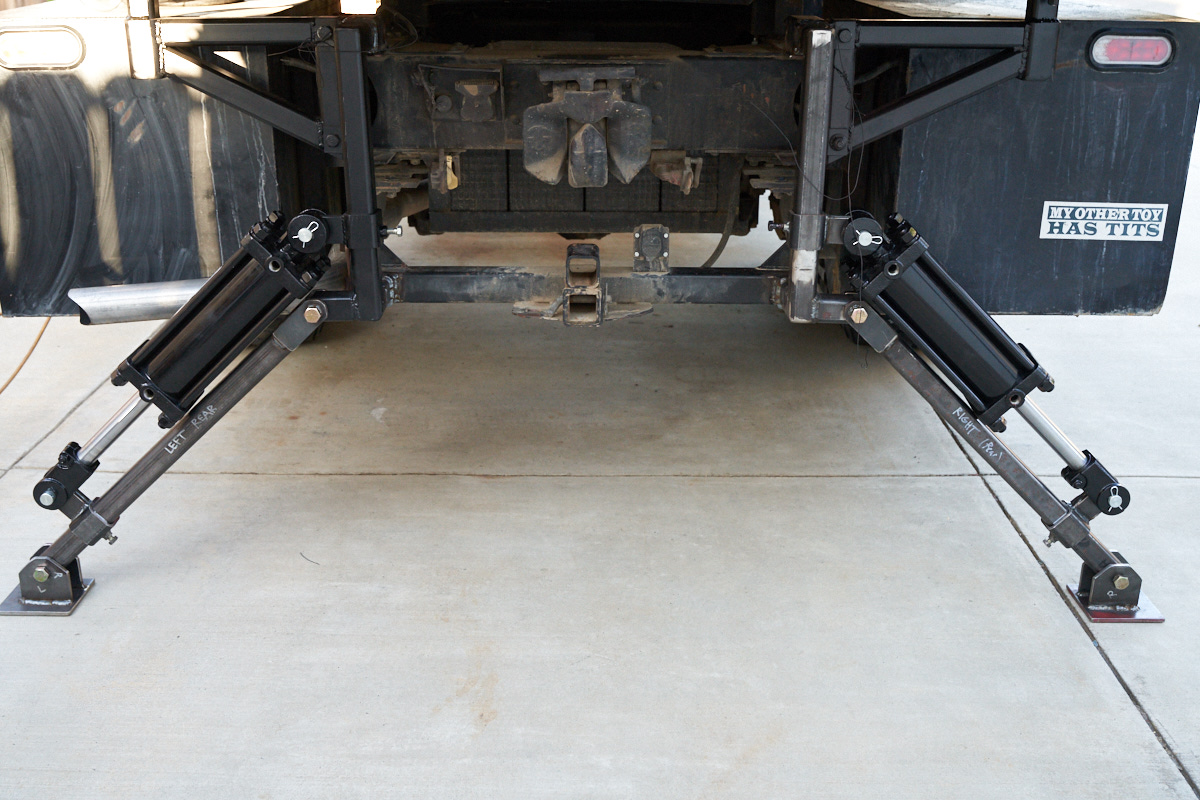
What the stabilizers will look like when in use. We were
stalled again due to parts availability. Our hydraulic
pump is stuck in China (likely due to Mr. T's trade war) and our
custom tool boxes have an 8 week delivery time. So, on to
the next task.
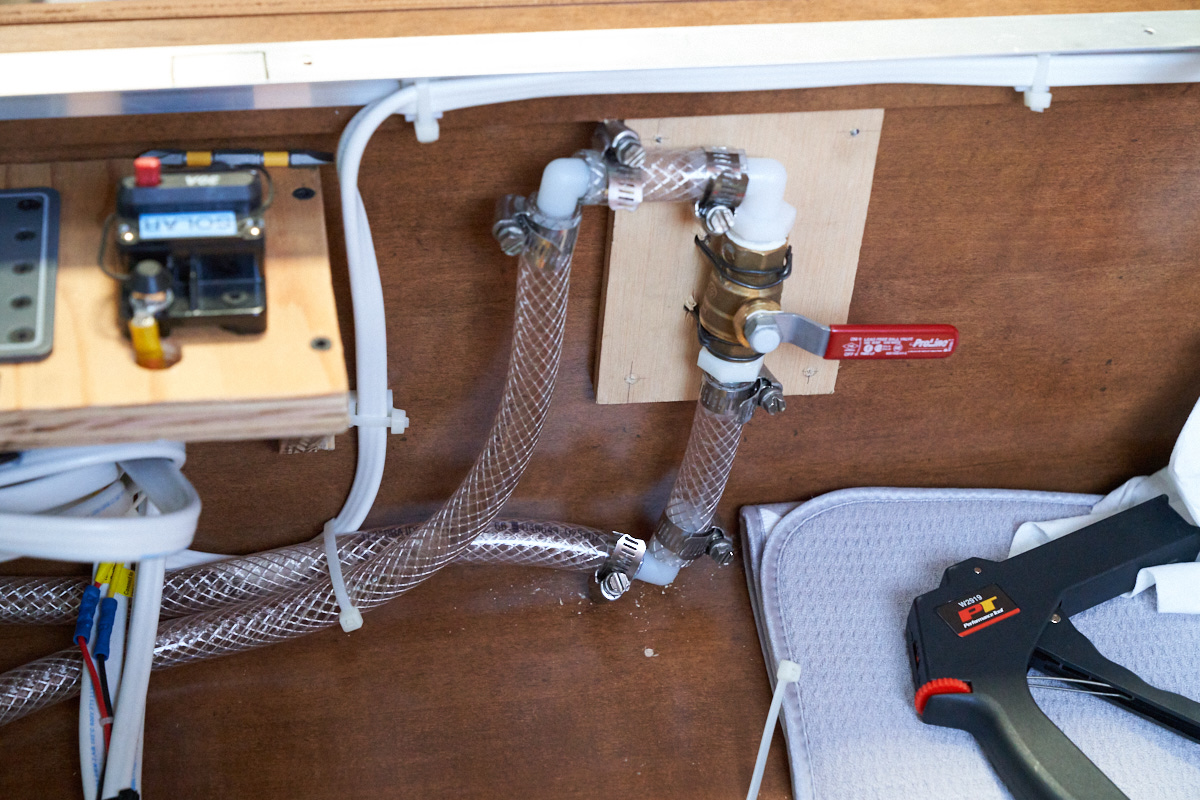
We tapped into Lance's internal plumbing to add a bypass valve
that will allow filling the water tank while connected to shore
water.
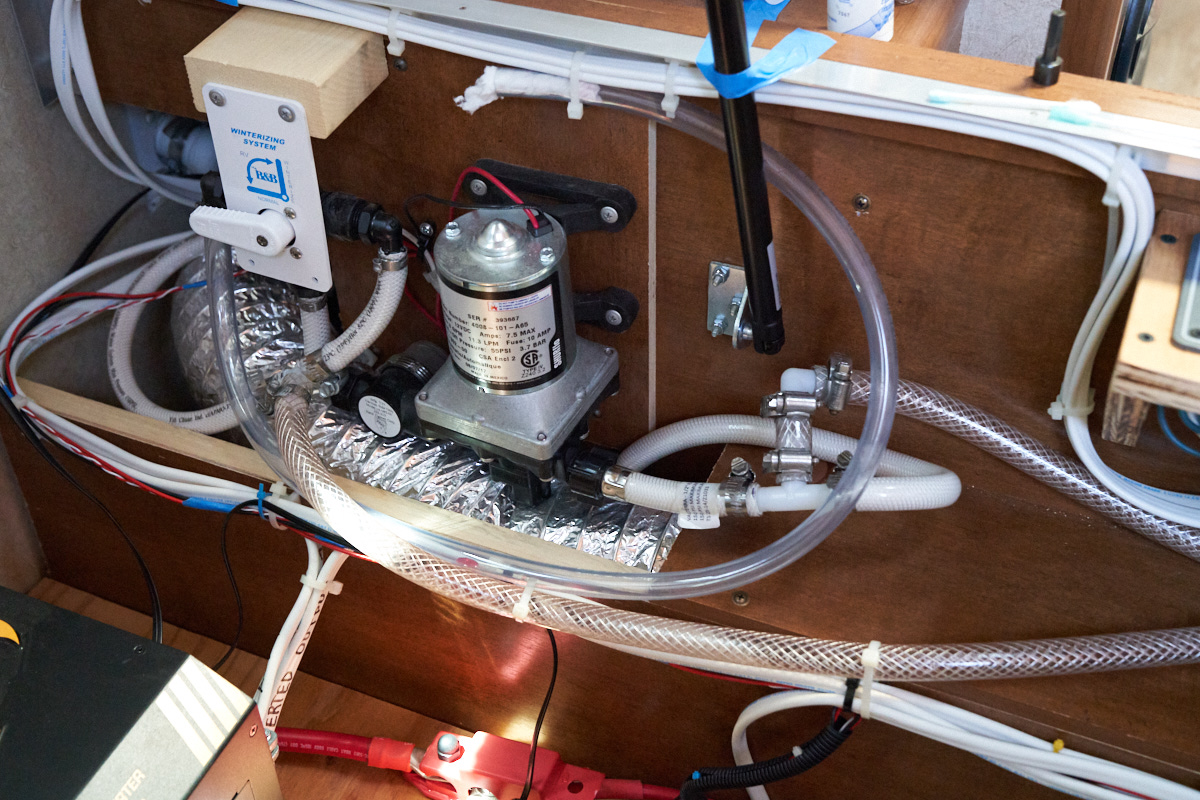
Some hose, a few tees and a box of hose clamps later we had our
bypass. Our tests were successful, so case closed.
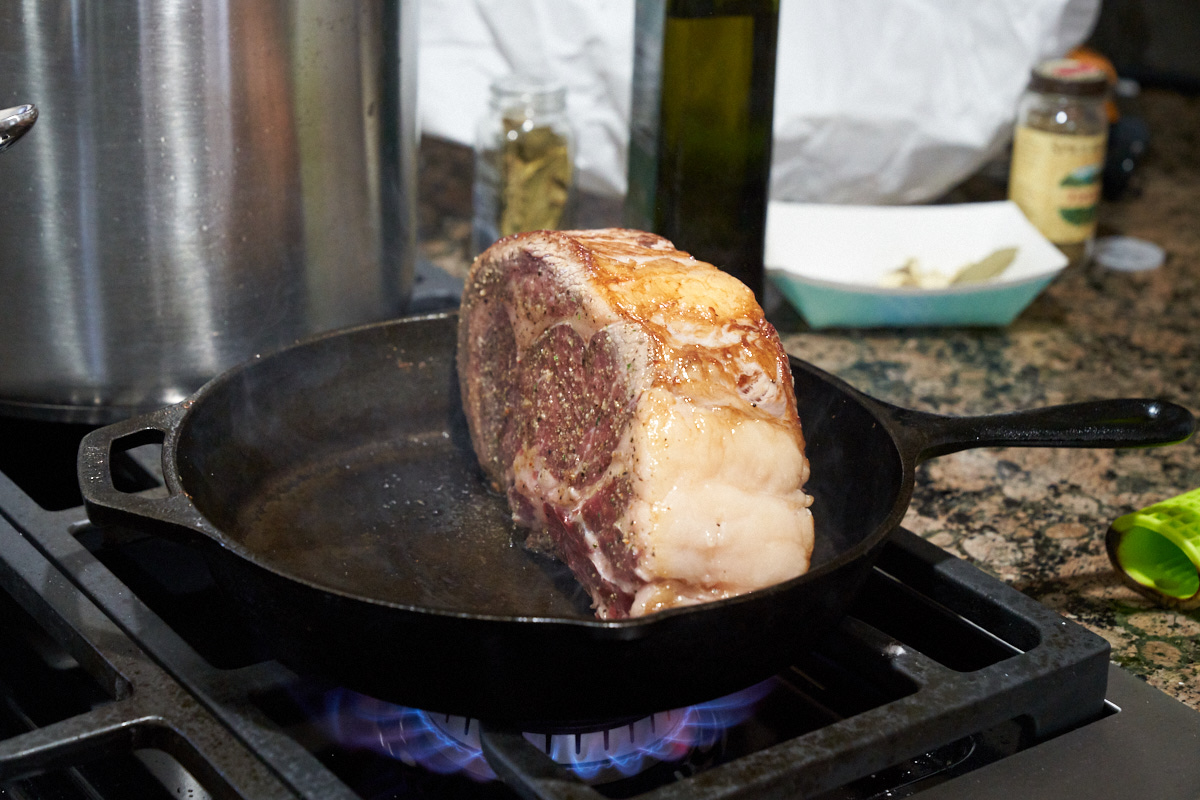
I love food photos. Particularly when I get to eat the
subject of the photo. We invited our dear friends Jim and
Michele for dinner and got a 3" Delmonico steak. A steak
this thick (and expensive) requires special treatment. Our
plan was to brown the surfaces and put the meat into our Sou
Vide water bath cooker. The meat goes into a sealed bag
and is then immersed into the temperature controlled water bath
for about 3 hours. This process allows getting all the meat
done to the same amount (medium rare in this case). When
the meat is finished it is then removed from the bath.
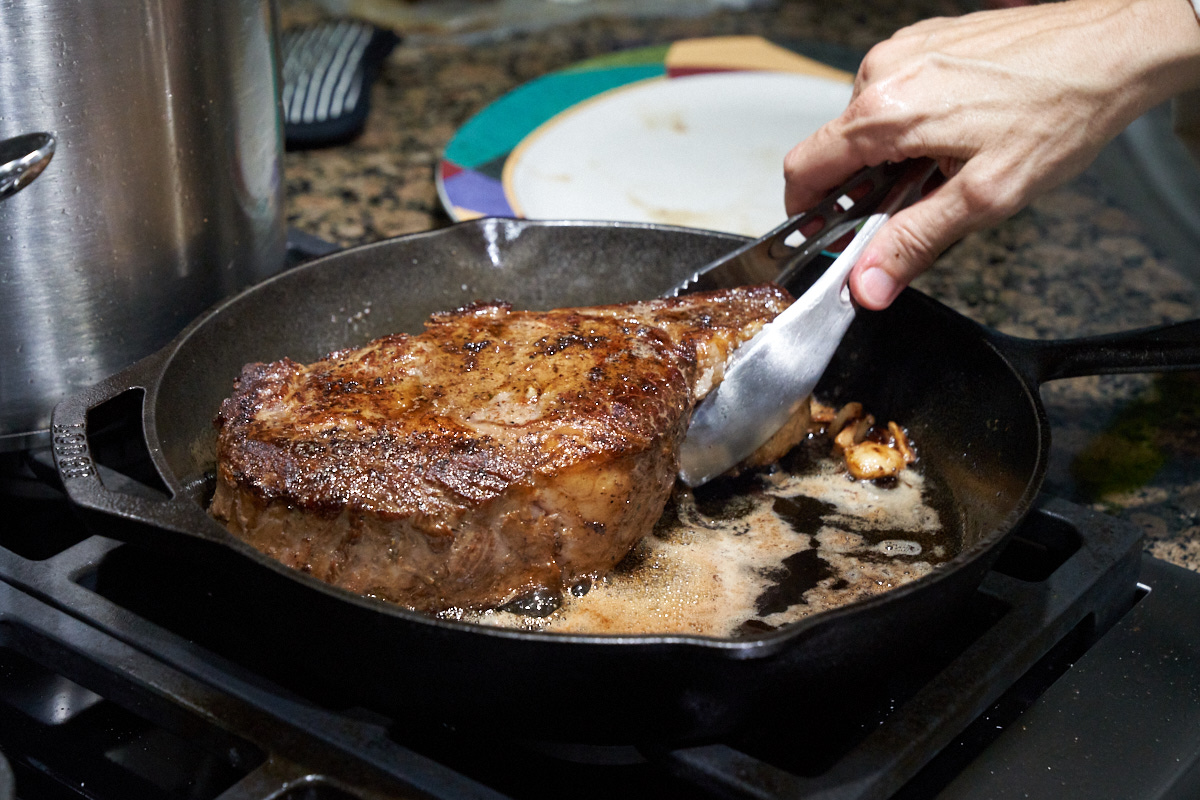
The sealed bag is cut open and the surface of the meat was
browned again in butter with whole garlic and spices prior to
serving. The meat juice was added to the pan to produce a
savory sauce. Trust me, it was as tasty as it looks.
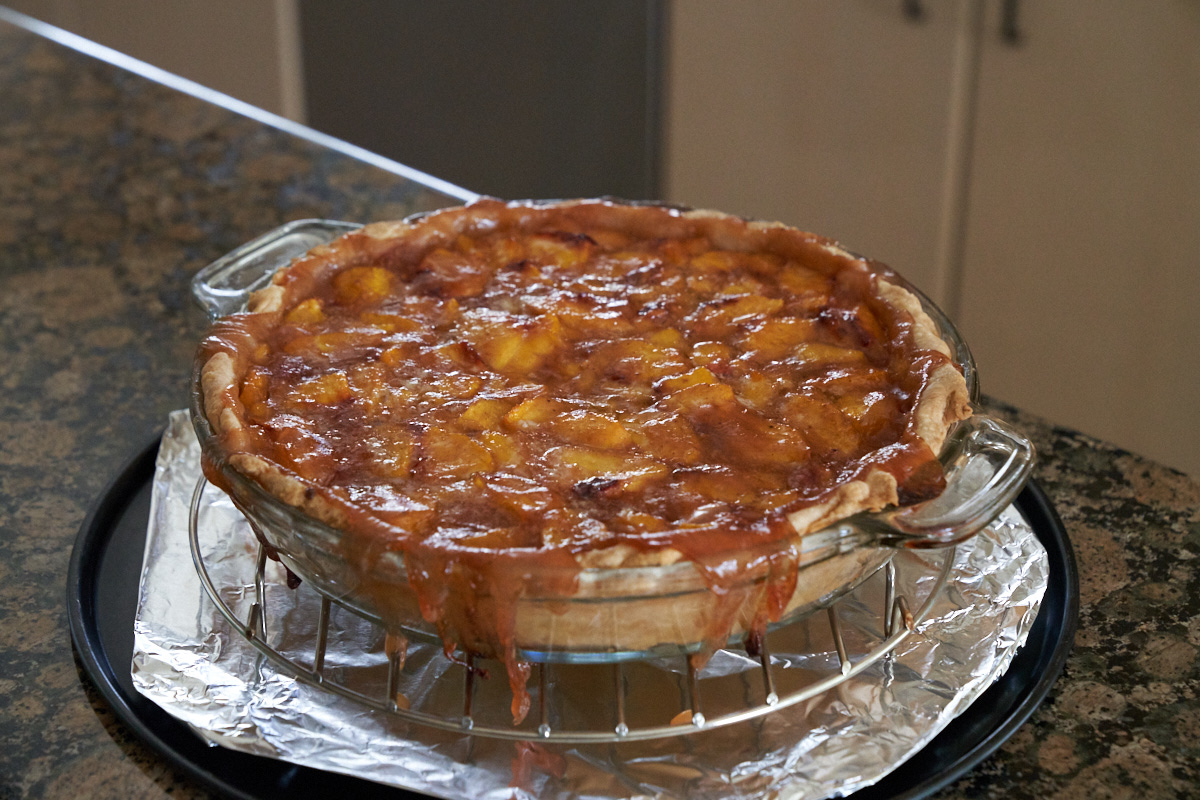
Kathleen also made a fully home-made pie of fresh peaches.
Sorry to say that due to
parts availability, our enhancement project is still
on-going. I am expecting the tool boxes around Thanksgiving,
maybe a bit sooner. The hydraulic pump? No telling on
that delivery but if the boxes arrive before the pump, I will
cancel the order and get a pump from a different vendor.
Back to Bill Caid's Home Page
Copyright Bill Caid 2019. All rights
reserved.